How to Fix TPM Issue in Windows 11 Installation on Hyper-V
If you are trying to install Windows 11 in Hyper-V and suddenly see errors related to TPM, don’t worry — this is one of the most common issues faced by system administrators and lab users. Windows 11 requires TPM 2.0 and Secure Boot, but virtual machines do not always have these enabled by default.
So, in this guide, I will help you to fix the TPM error using Hyper-V settings.
Why TPM Error Happens in Hyper-V
Windows 11 has strict hardware requirements such as:
- TPM 2.0 support
- Secure Boot enabled
- UEFI firmware
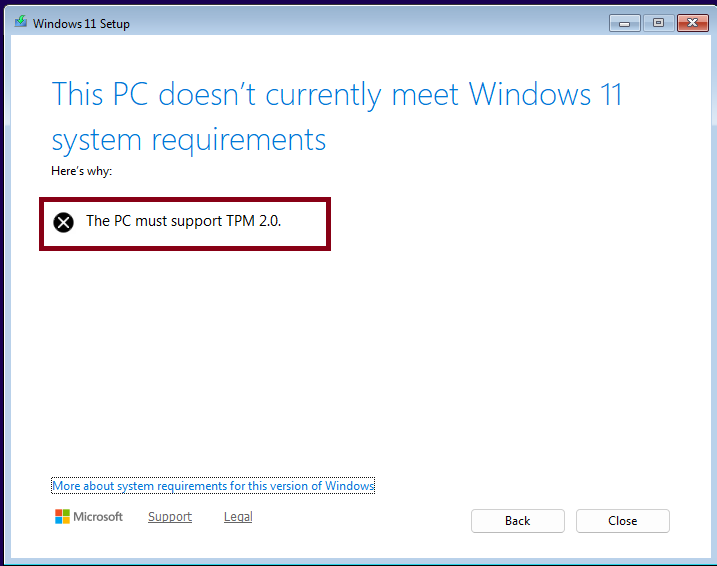
When you create a Virtual Machine without enabling virtual TPM or when you use Generation 1 instead of Generation 2, the Windows installer shows errors like:
- “This PC can’t run Windows 11”
- TPM not detected
- Secure Boot requirement missing
Enable Secure Boot
Secure Boot is mandatory for Windows 11.
- Right-click on your Virtual Machine → Settings.
- Go to Security tab.
- Click on Enable Secure Boot
- Choose the Microsoft Windows Template.
- Also Enable Trusted Platform Module (TPM)
- then click on apply and ok.
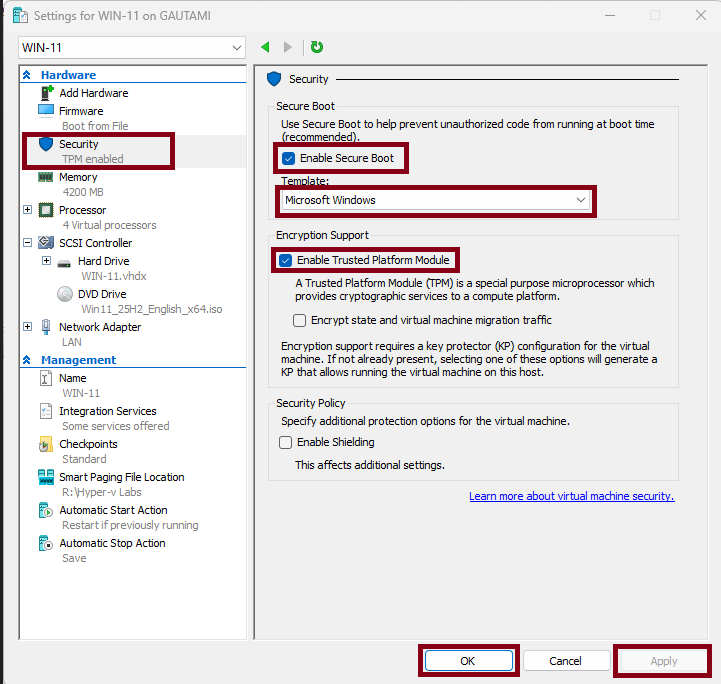
After changing these settings, the Virtual Machine behaves like a modern UEFI system. Make sure when you are changing these settings, Machine is powered off otherwise you cannot Enable these settings.
Conclusion
TPM errors in Windows 11 Hyper-V installations are not actual hardware problems — It usually happen because the virtual security settings are missing. Once you enable Generation 2, Secure Boot, and Virtual TPM, the installation works smoothly.